Quilty Chicks BOM: Chick Quilt Block Tutorial


Ready to make the Cute Chicks in the Quilty Chicks Block of the Month? These chicks are absolutely adorable and I can’t wait to see yours. Keep reading or watch the video for all the details.
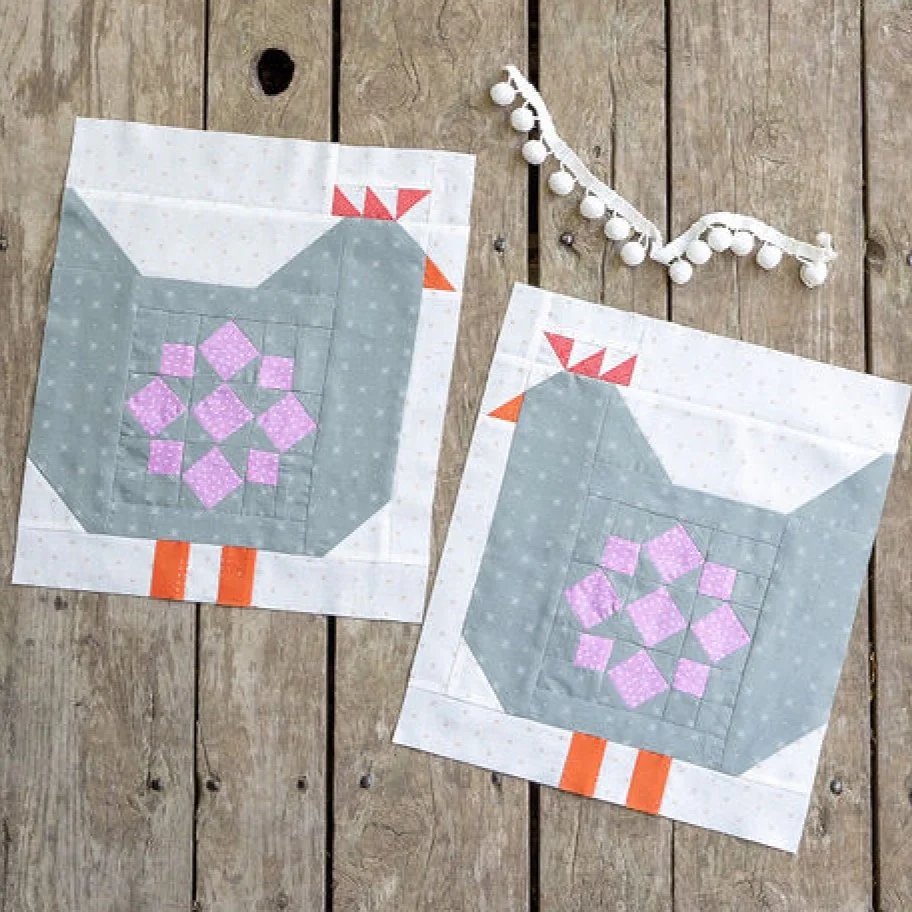
How to Make the Cute Chicks Quilt Block:

The first edition of the pattern has an error in the chick cutting instructions for the Background fabric. You do NOT need to cut the 1 1/2” x 7 1/2” pieces listed. Everything else is accurate. If you have a second edition, those pieces will not be listed.
Cut all Chick Background, Orange, and Yellow fabric pieces as listed in the beginning of the pattern.
Label all Background fabric pieces with their size. This will make piecing much easier.

2. Draw lines from corner to corner on all the indicated squares in step 1. I hate drawing lines so I tried to skip this step in the video because the pieces were so small. But because the orientation of the lines is so important, I had to go back and mark them. Just go ahead and mark them from the start. :)
My number one tip for this block is to double check the orientation on all pieces before sewing. The chicks are facing in different directions and orientation of all the marked lines is crucial. Refer to the pattern regularly.


3. Prepping and pinning the units from steps 2-5 can speed piecing. Orient and pin all the small squares as shown in the instructions. Then sew all of the units at once.

4. Trim off the corners and press. You can use scissors or a rotary cutter and ruler to trim. Because the pieces are so small, I used scissors. Refer to the video for additional pressing tips.

5. Refer back to the instructions and pin and sew the final pieces on the Wing and Beak units.

6. Make the Leg units. The pieces are very small and you may wish to finger press the seams.

7. Layout all the units. Double check that they are oriented the correct way.

8. Sew the units together in the order indicated in the pattern. Pinning multiple units before sewing can speed the piecing process.
Lining the Beak up with the Head unit can be tricky. You can increase the stitch length and baste the Beak unit onto the block, check the placement of the Beak and adjust if necessary. Once the placement is good, sew over the basting stitches with a regular stitch length.

9. Press well and sew the large Background rectangle to the top.
There it is! The cutest chick blocks ever! Thanks for sewing along!