
Stretched-16 Patch Quilt Block Tutorial

Stretched 16-Patch, quilted by Trace Creek Quilting.
I love quilts that are simple and fun! Sometimes you just need to play with fabric and not worry about technique. These blocks were so fun to make that I ended up making 3 Stretched-16 Patch quilts! I never do that! As an extra bonus, this block is virtually waste free. Got to love that!
The Stretched 16-Patch block is also great for making donation quilts. My friend Stacey of Stacey-Lee Creative is heading up an amazing quilt drive. The donated quilts will be given to children in foster care in a nice bag along with toiletries, pajamas, and more. You can find all the details here.
You ready to make the Stretched 16-Patch block with me? I’ll walk you through it step-by-step in this tutorial. If you want more details, watch my YouTube video. And click here to download a printable copy of the pattern - including the super Skinny 16-Patch variation.
Without further ado, let’s get started!

Step 1:
Each Stretched 16-Patch block is made with two different fabrics. Choose fabrics that have a significant difference in value. You can check the contrast by using the black and white filter on your camera/phone.

Step 2:
Cut:
(2) 3 ½" x 19" strips from lighter fabric
(2) 3 ½" x 19" strips from a darker fabric.
For specific cutting instructions and fabric requirements for 5 quilt sizes, download the printable pattern.


Step 3:
Lay out the strips: dark, light, dark, light. Place a lighter and a darker 3 ½" x 19" strip right sides together and sew along the length. Repeat for the second light and dark strips.

Set seams and press toward the darker fabric. Then sew the two strip sets together so that the colors alternate. Set seam and press toward the darker fabric.


Step 4:
Now it’s time to cut! Square up one end of the strip set. Then sub cut the strip set into (4) 4 ½" wide segments.
You can also fold the strip set in half along the length and cut two segments at a time. This is my preferred method because it is faster. Just be careful and make sure the edges and seams are lined up.

Step 5:
Lay the segments horizontally and rotate two of the segments to make a checkerboard pattern. Place a dark fabric patch in the upper left corner. If the darker fabric is in the upper left corner on each block it will allow a light/dark/light/dark pattern to continue across the quilt.


Step 5:
Nest seams, pin, and sew the four segments together.
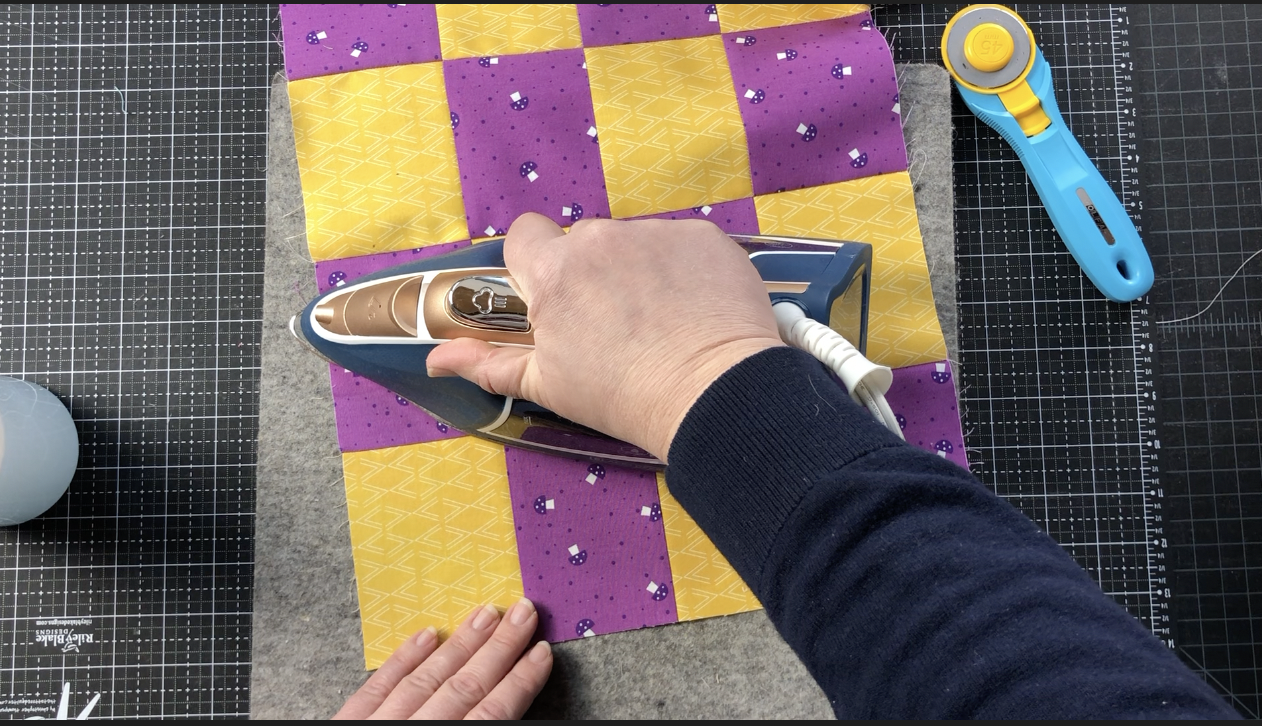
Set seams and press toward the top of the block. Pressing the seams up on all of the blocks will allow the seams to nest well during final construction.

After you make all the blocks for your quilt, lay them out and arrange as desired. Then rotate every other block until it is facing in the opposite direction. This will alternate the direction of the final seams and allow them to nest nicely.

If you want to make the Skinny 16-Patch block, download the free pattern. The Skinny 16-Patch is made with 2 1/2” strips, and it a great way to use up extra precut strips.

Quilted by Trace Creek Quilting